

AWS IAM Identity Center was formerly called AWS SSO until 2022.
As our team grows at Purple Technology and as we give access to AWS console also to non-developers, we decided to switch from legacy IAM user + assume role model to AWS IAM Identity Center which is much better suited for our use-case.

After we got used to accessing our AWS accounts comfortably via AWS IAM Identity Center we realised that we could also use this Single sign-on approach for accessing our internal applications and control all the permissions from a single space. So we started to research what is SAML, how it works and how we could actually implement it. Since SAML itself is quite old protocol, there is not many articles and libraries for modern languages and environments like "TypeScript inside a Lambda function behind API Gateway". So we had to do quite a bit of reverse engineering of current JS libraries in order to understand all the relevant procedures, HTTP methods and endpoints which are required to successfully and securely authenticate user via SAML.
Let's take a look at what we learned along the way and how to make it work with Serverless application.

Why do we use AWS IAM Identity Center?
- IAM user + assume role had one big security disadvantage. If some employee left the company, we had to be alerted about that and had to deactivate his access. And such solution is fragile and can be unreliable.
- Since our company is powered by G-Suite maintained by our ICT department, we can add Google as external identity provider to AWS IAM Identity Center and make sure that only relevant people have access to AWS.
- Having Google as external identity provider itself is a big security improvement because Google has so many security features to make sure the Google account is not hijacked and also has comfortable UX for these unpleasant security procedures like MFA.
- Another advantage of AWS IAM Identity Center is that it doesn't even offer you possibility of having long-term credentials on your machine and every time the session expires you need to login via browser popup which is also quite decent security improvement.

How does SAML work? The relevant parts.
There is a huge specification of the whole SAML protocol online. I'm going to describe just the parts I think are relevant for making things work between AWS IAM Identity Center and our serverless application.
The basics
In SAML there are three parties:
- User: web browser
- Identity Provider (IdP): source of user's identity, in our case AWS IAM Identity Center service
- Service Provider (SP): our application which wants to authenticate the user
There are two types of Single sign-on initiation:
- Identity Provider initiated SSO:
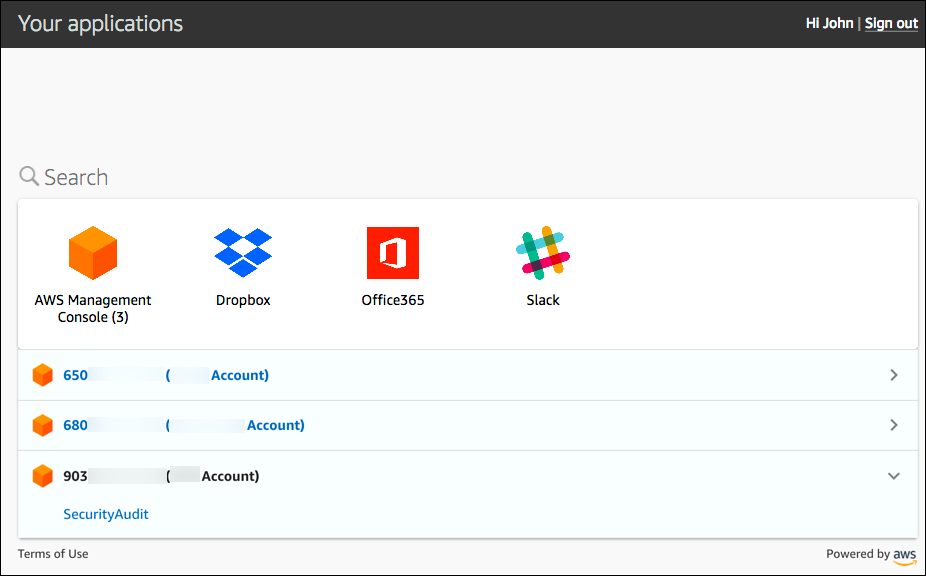
User clicks inside the SSO portal that he would like to open application "X" and is automatically signed in to the application.
Meaning that the Identity Provider (for example AWS IAM Identity Center) initiates the login process. - Service Provider initiated SSO:
User clicks inside the application "X" that he would like to sign in via the AWS IAM Identity Center portal.
Meaning that the Service Provider (the application) initiates the login process.
Lesson learned No. 1:
AWS IAM Identity Center simplified this for us because it supports only the first option - Identity Provider initiated SSO.
Communication
Now when we know that AWS IAM Identity Center Supports only IdP initiated SSO, we can take a look at how the IdP communicates towards SP (=our application).
Since SAML was born in 2002 it uses technology of that time - namely XML for serialising the data.
Now comes the question how does the information about the authenticated user in XML format gets from the IdP to our application? When we add a new SAML app to AWS IAM Identity Center, we must provide "ACS URL" which translates to "Assertion Consumer Service URL", which is the only important URL for making this work.
There is also one more required field "Application SAML audience" where we can put any arbitrary value in our case. You can read more about it here.
All the other fields are not important for us.
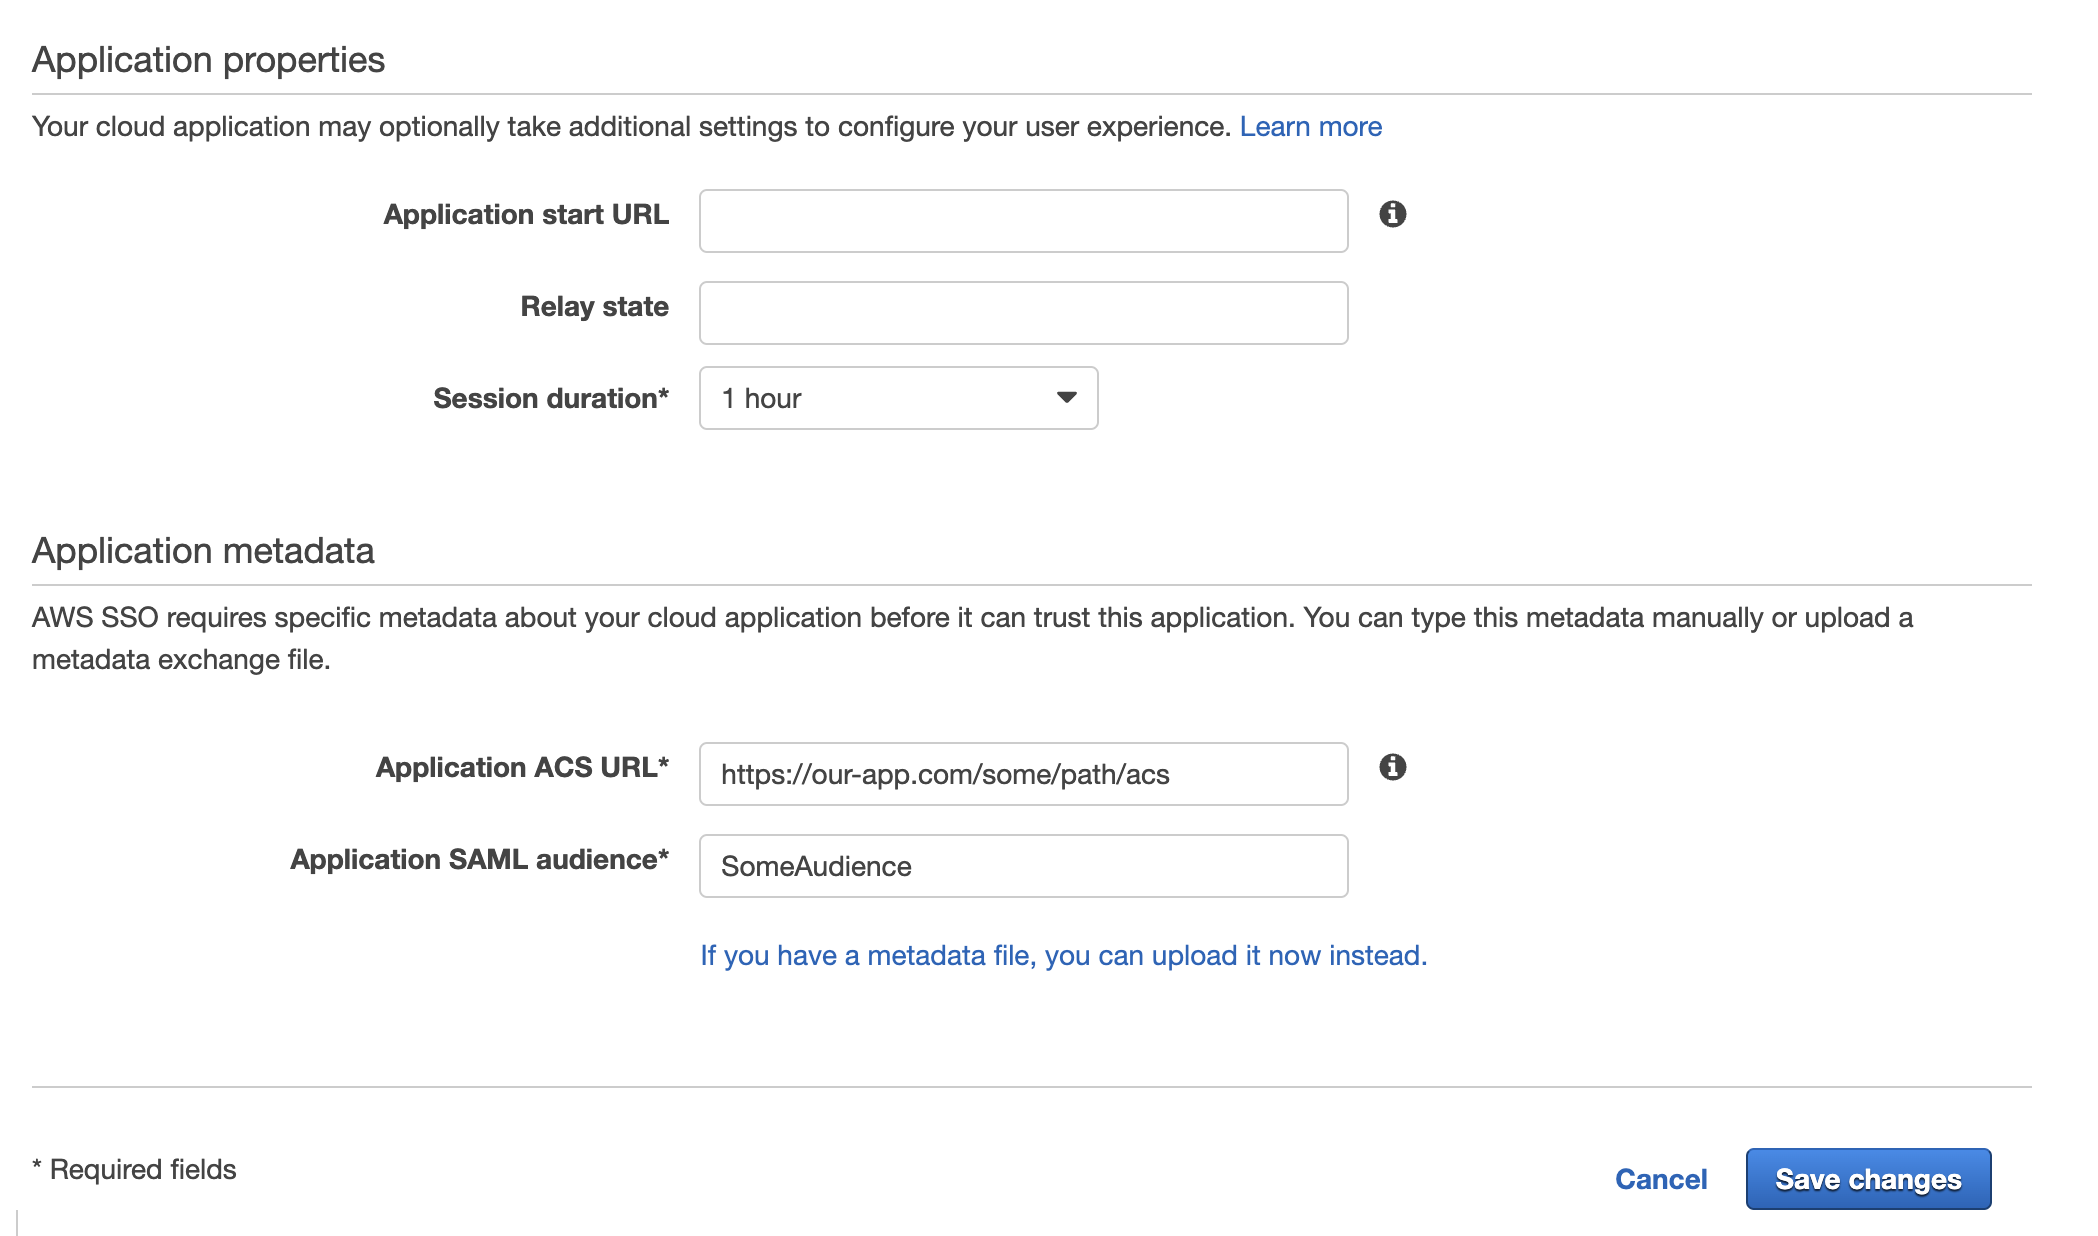
Now we know that AWS IAM Identity Center will communicate in XML towards ACS URL.
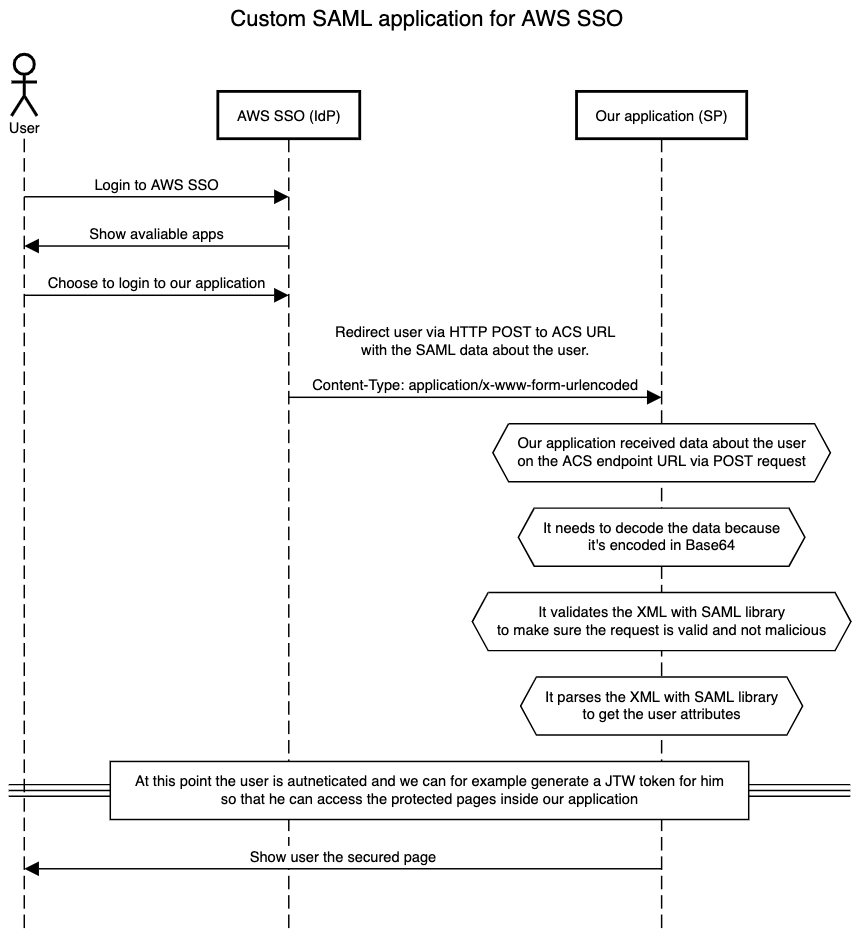
SAML communication between IdP and SP (=our application) happens only in user's browser, no background server-to-server webhooks. AWS IAM Identity Center as most IdPs utilizes combination of HTML <form> element and HTTP POST method for initialising the SSO process.
In practise it work like that IdP puts to a <form> an <input/> element with name SAMLRequest which contains Base64 encoded XML payload and then submits the <form> automatically via JavaScript towards your ACS URL.
Example:
<html>
  <body onload="document.forms[0].submit()">
    <form method="POST" action="<%= $sp_acl_url") %>">
      <input type="hidden" name="SAMLRequest" value="<%= request.getAttribute("SAMLRequestBase64") %>">
    </form>
  </body>
</html>Lesson learned No. 2:
AWS IAM Identity Center moves user to the ACL URL via POST request with data about the user included in the request body asapplication/x-www-form-urlencodedencoded in Base64.
User information
Once we receive the data via POST request and decode it, we get string containing so called Response SAML Assertion which needs to be validated and parsed. This XML document then contains information about the authenticated user.
Make sure to your SAML library validates these security aspects of the document:
- Timestamp expiration condition
NotBeforeandNotOnOrAfter, to prevent replay attack - XML signatures
<ds:SignatureValue>, to make sure there are no malicious modifications done to the content of the document - XML certificates
<ds:X509Certificate>, to check whether the document was signed by your AWS IAM Identity Center provider
Take a look at the example assertion XML document here.
Lesson learned No. 3:
Make sure your SAML library of choice validates all aspects of the assertion document in order to have secure authentication.
Implementation
The best library for JavaScript/TypeScript project is samlify, which is sponsored by Auth0 which is one of the biggest players in authentication and authorisation industry. This gives the library decent credibility, which is important aspect.


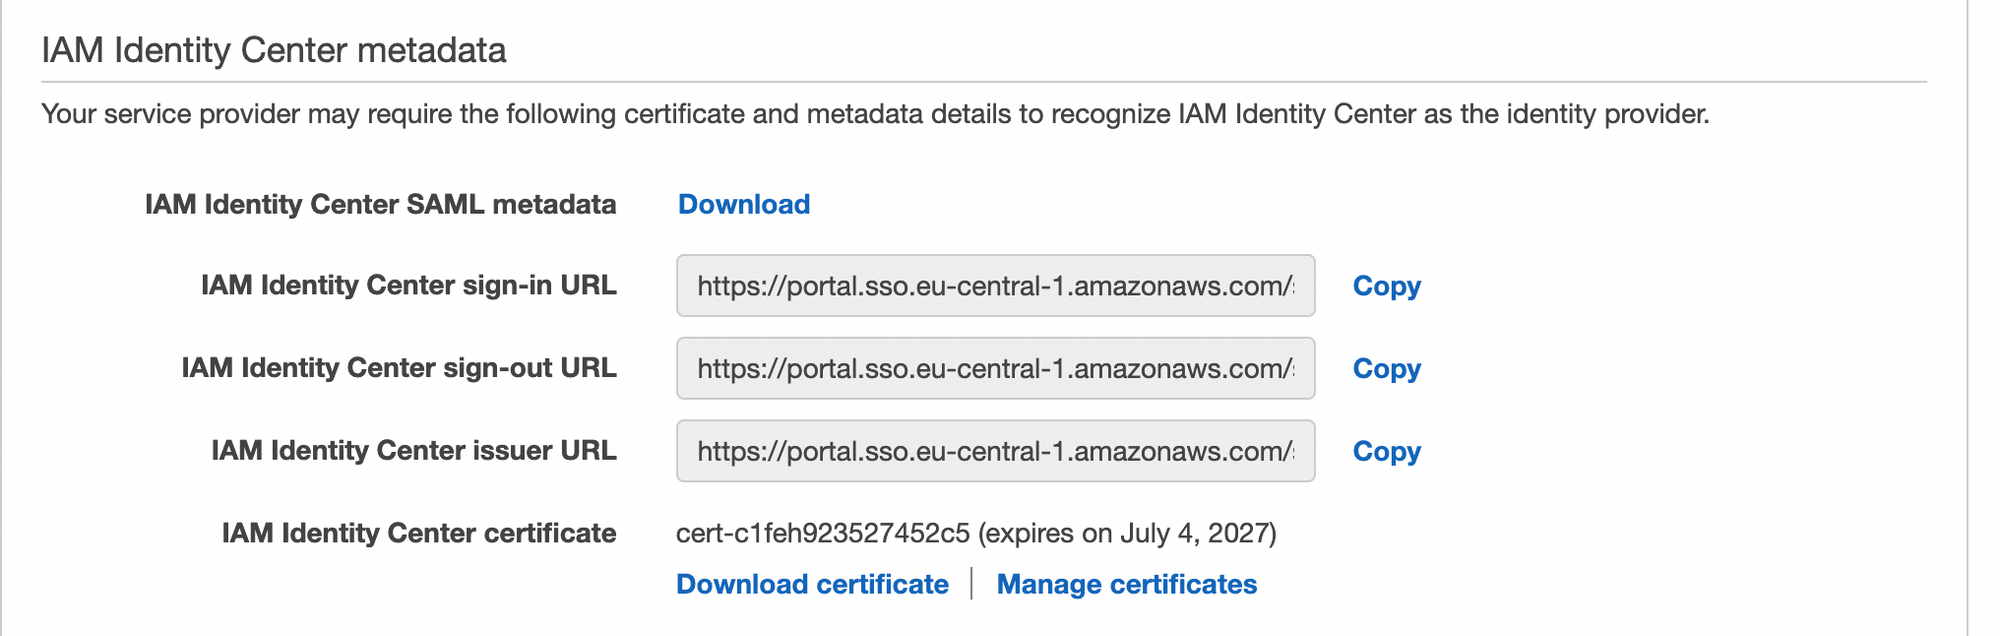
In order for the library to be able to validate the signatures and the certificate, we must provide the library with so called "IdP Metadata" XML. In AWS IAM Identity Center it can be found in "Configuration" tab of the SAML application.
import * as validator from '@authenio/samlify-node-xmllint'
import { APIGatewayProxyHandler } from 'aws-lambda'
import * as samlify from 'samlify'

import { metadataXmlString } from './metadata'

samlify.setSchemaValidator(validator)

export const handler: APIGatewayProxyHandler = async (event) => {
	const sp = samlify.ServiceProvider({})

	const idp = samlify.IdentityProvider({
		metadata: metadataXmlString
	})

	const params = new URLSearchParams(event.body ?? '')

	const data = await sp.parseLoginResponse(idp, 'post', {
		body: {
			SAMLResponse: params.get('SAMLResponse')
		}
	})

	console.log(JSON.stringify({ event, data }))

	return {
		body: JSON.stringify(data),
		statusCode: 200
	}
}
The final implementation of a Lambda function hooked up to an API Gateway POST endpoint is quite simple, as you can see above.
In case of receiving invalid data parseLoginResponse method throws an error with the validation error information.
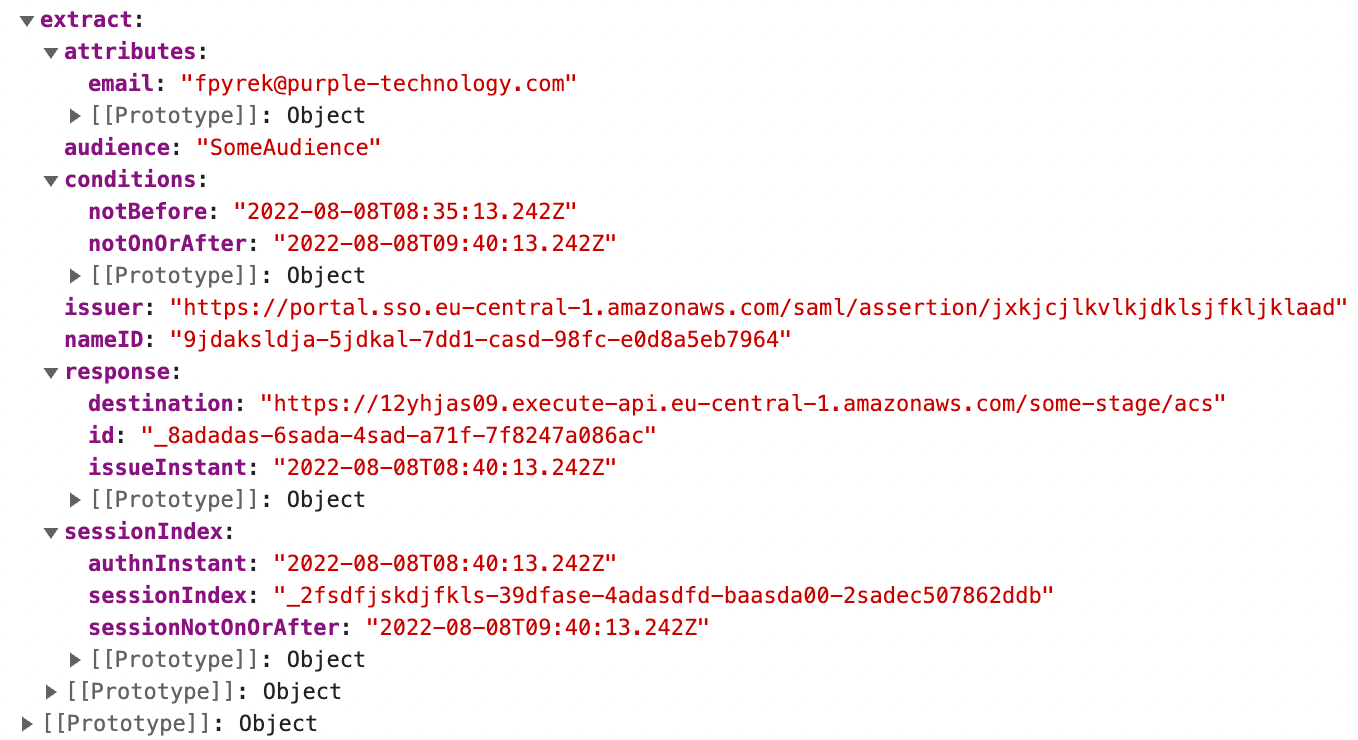
Here you can se value of the data variable from which you can now securely extract all the necessary information about the user and for example set the cookie or some auth token and redirect him to the secured page.

Conclusion
Googling study materials and tutorials about SAML can be hard compared to amount of content produced for modern technologies. Hopefully this article gave you at least basic overview on how to make it work and what library to choose in order to have secure authentication.
If you have any questions, let me know on Twitter @FilipPyrek.
With ❤️ made in Brno.